Based on numerous requests from customers, G-Accon has recently released our Tracking Summary Report function. We will briefly cover the report’s features below, but to view more details, please visit our G-Accon User Guides.
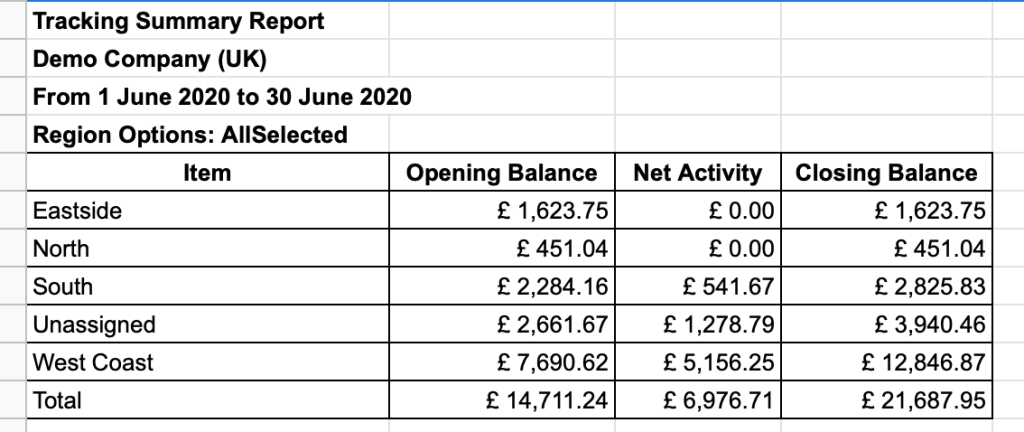
The Tracking Summary Report generates a list of your tracking options, showing activity in a particular group of accounts for a specific time period. The beauty of this report is the ability to select the desired accounts and view the Opening, Closing balances, and Net Activities based on the selected date range.
How can I generate these reports?
To get accounting report data from Xero, you first need to be logged in. Then, you need to select these following options from the menu: Add-ons -> G-Accon for Xero -> Get Accounting Reports -> Tracking Summary.
The next step is to select Tracking Summary report from the drop down menu.

How can I select filters?
G-Accon for Xero provides the ability to set up the Date Range for your data manually or you can refresh your data dynamically. The date range suggestion cannot exceed 365 days. The report data will be calculated based on your selected Date Range.
You can select specific accounts and choose which columns need to be in your report by selecting items in the Columns’ Titles.
Most importantly, you now have the ability to select tracking categories and options. The activity will only be visible for an option if the transactions have been assigned to an account.
If there are transactions in the chosen account group that weren’t tracked, these are displayed as Unassigned.
Opening and Closing balances are displayed for each category option based on the date range. The balances are based on the financial year to date for revenue and expense-based accounts. You can display the balance of all transactions for asset, liability, and equity-based accounts.
Net activity shows the outcome of all approved transactions (except purchase orders and quotes) that have gone in and out of the accounts belonging to the account group.
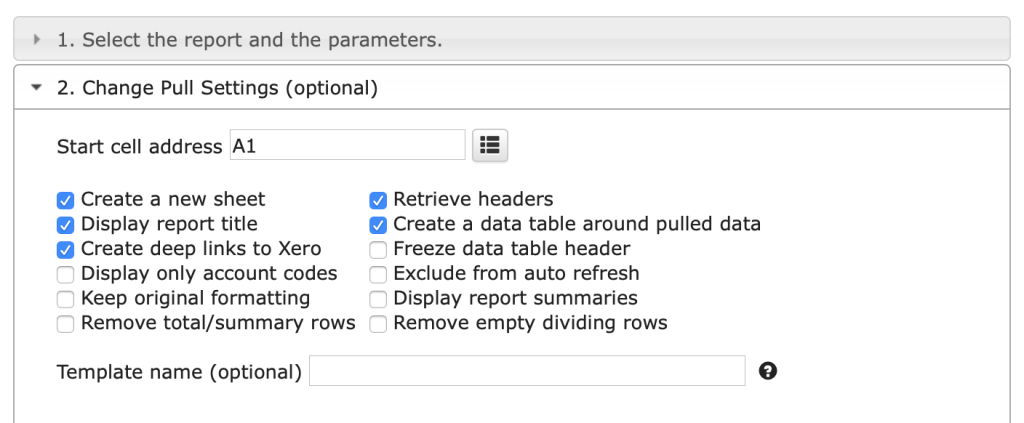
As per usual, G-Accon for Xero provides Optional features that might be useful for your business in both reports.

You have the ability to choose the start cell – for instance, A11 – and the name of the template in the Template Name field – for instance, Template #1.
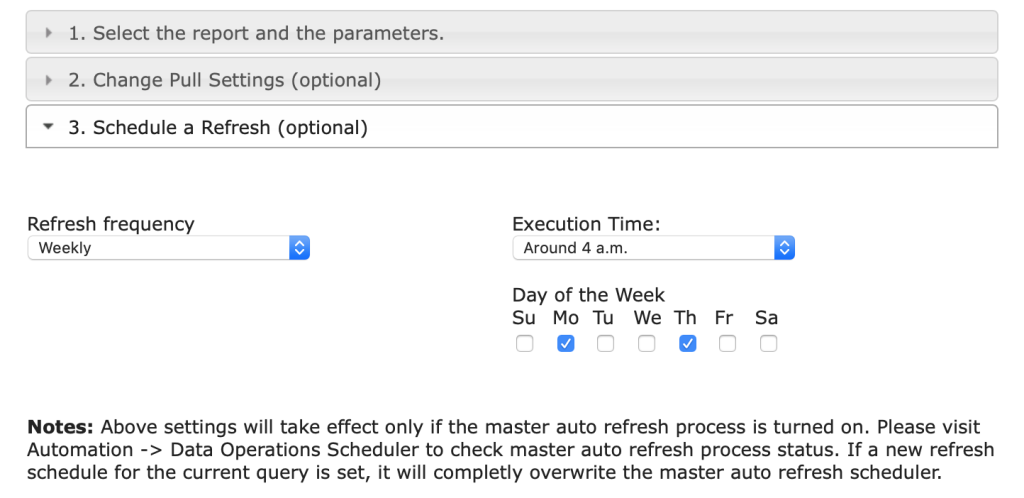
How can I schedule a report automation?
To schedule the auto-Refresh, you can use the option Schedule a Refresh. Remember that this setting will only take effect if the master auto-refresh process is turned on. See the Automation process explanation for more details.

How can I execute reports?
To execute the queries, you need to click on the “Execute” button. The Tracking Summary details will be populated in the Google Sheet. Here is a sample of a report after an execution.


